

How To Repair The Seam On A Rubber Room
- Near
- Latest Posts
![]()
My name is John and the possessor of Maze Leather. I've been working with leather for a couple years now and defended this space for making content to help others get into leather crafting. Regardless of skill, hopefully y'all tin find some type of resources through this site. Give thanks you lot for visiting Maze Leather!
![]()

If you take had a leather chair for quite some time yous will start to notice seams tend to rip. Luckily you tin repair a broken seam with a couple items that are fairly inexpensive.
Plus learning how to repair a broken seam in leather upholstery by hand will allow yous to ready seam for couches, chairs, recliners and even auto seats.
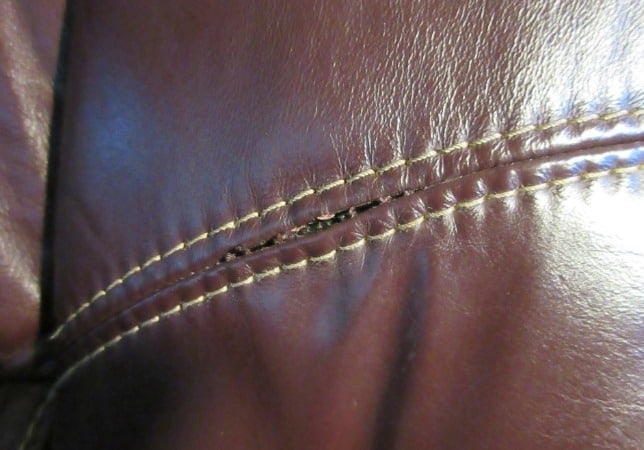
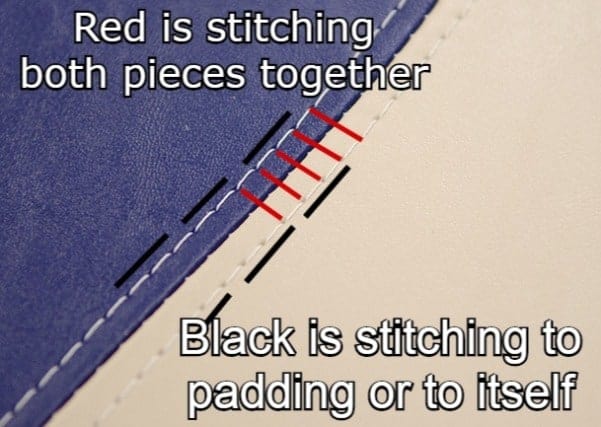
If yous have read my 'vii Unlike ways to stitch leather' guide yous will know that this common seam in leather upholster is called a French Seam. A French seam tends to have two pieces of leather sewn together and then each piece is sewn to a back padding.
This allows for the seam to be much stronger than an average stitch. Only if you discover a seam starting to split, information technology's better to accept intendance of it before it gets worse.
When fixing the run up we will be working in between the ii pieces (or where the crimson marks are for the french seam).
To prepare this we will need a hooked sewing needle, some sort of polyester/nylon thread. I am using the industrial revolution thread I use when leather crafting since it is very durable.
For actress help yous may desire to use some needle nose pliers for pushing/pulling the needle through and a seam ripper to open up up the seam.
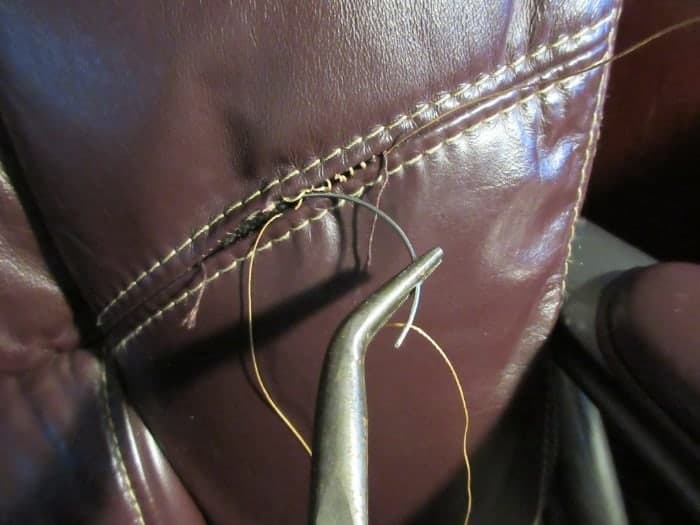
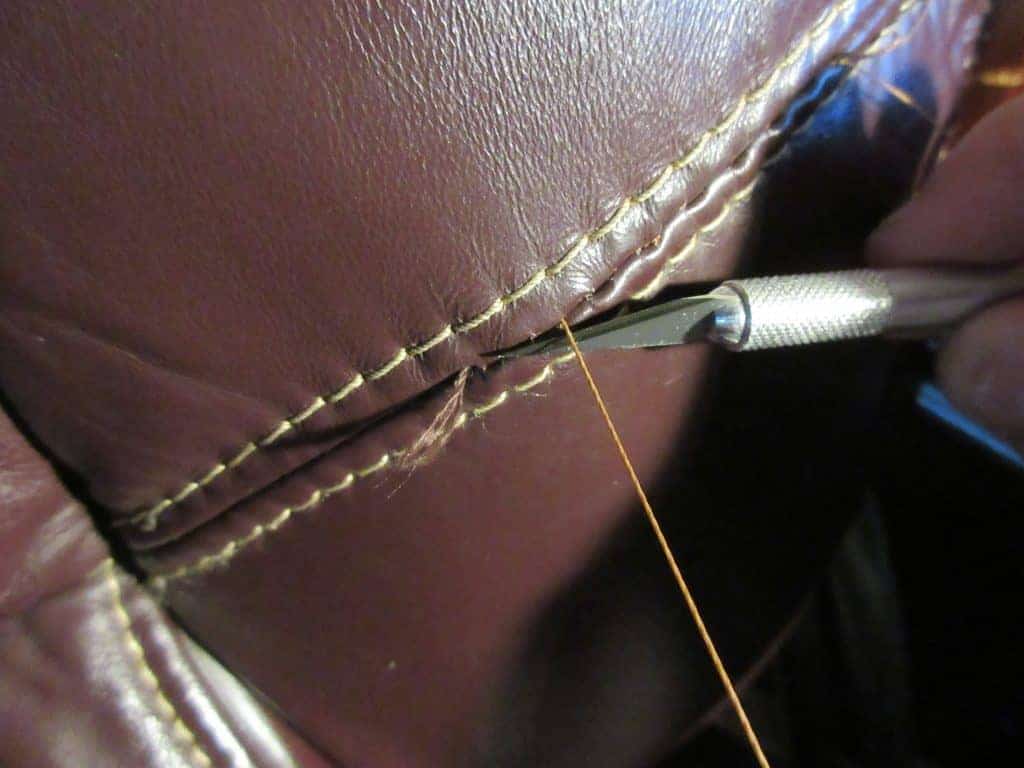
Step 1. Prepping the cleaved seam
Once yous are ready to sew together the cleaved seam you will want to open up the seam a bit more than.
To showtime you will want to use a seam ripper (or the hook needle in my instance) and pull on the thread that is still intact.
When doing this, y'all will be popping out the thread that is holding the seam together nevertheless.
Do this for both sides until you have about 1.5-2 inches of thread on each side of the seam. This will open the broken seam a bit wider simply this will help when finishing the seam.

Step two. Repair a cleaved seam in leather upholstery
Now that the seam is a bit more open and the thread tin be accessed we tin can begin repairing.
While repairing the seam all we volition need to do is run new thread through the holes in the original stitching. One time in that location is new thread nosotros can tighten the stitch and necktie off the ends and take a new seam.
To interruption that down I will showtime by placing my thread through the heart of the hooked needle.
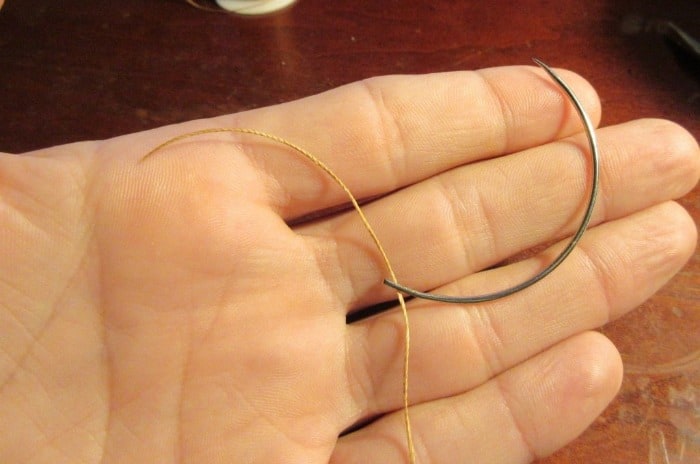
And instead of tying the thread off like yous would sewing or stitching a cloth we will allow it to but sit through the eye. Allow the thread to take around 3-4 inches of length to ensure the needle does not come off of the thread.

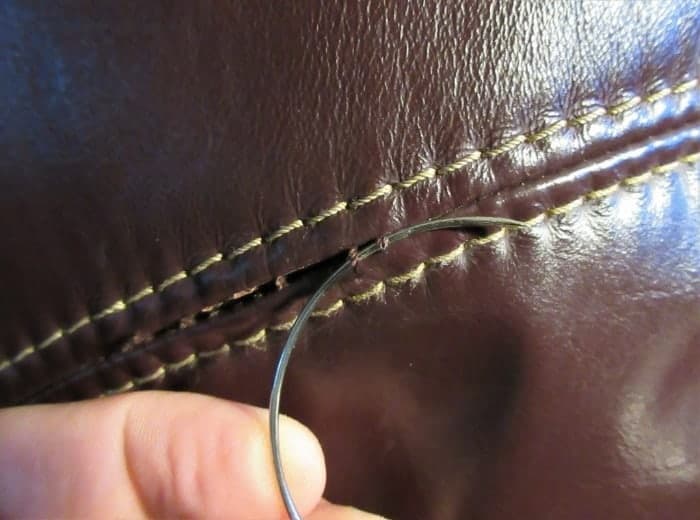
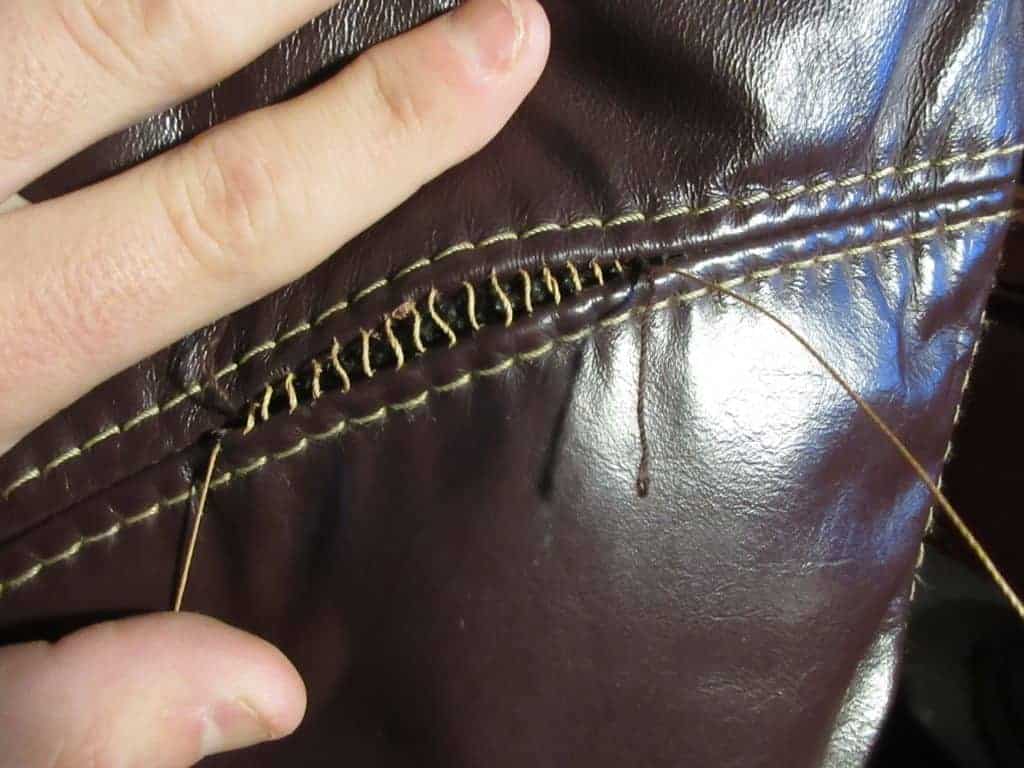
Now that the thread is on the needle you tin can begin stitching through the old seam.
To start you volition desire to begin on the hole parallel to one of the original threads.
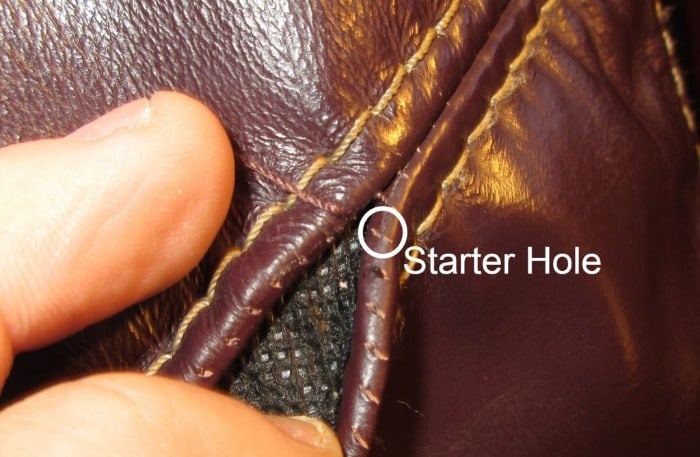
Having the hook needle will assist when entering the starting time hole then going out the hole adjacent to it.
In one case in the first hole you will want to push button the claw effectually until you lot see information technology pop out of the hole next to it.
Run the needle and thread through both of these holes and allow for about iv inches of thread to stick out the first pigsty.

Allowing for the thread to hang out the back of the first hole will be the ballast. Brand sure not to pull too hard when going through the adjacent couple holes to pull that piece through the kickoff hole.
Now you will want to run the needle through the parallel pigsty you just pulled the needle through (in my example the to a higher place hole).
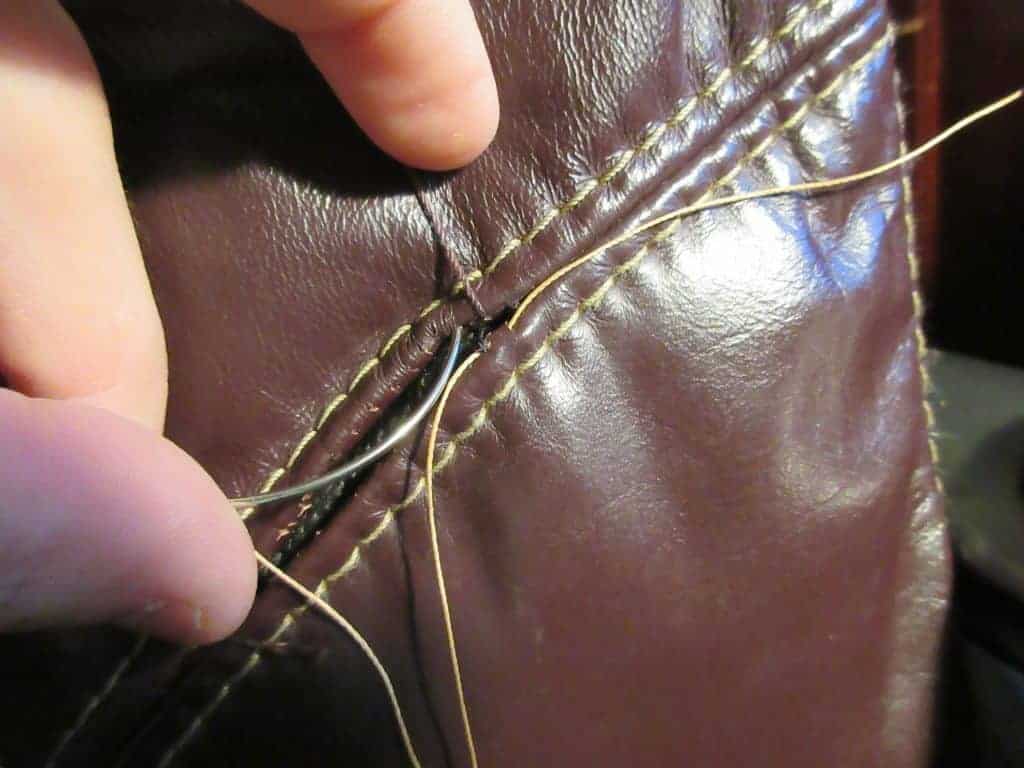
You will do the same thing by going into the parallel hole then running the needle through the pigsty adjacent to it. This will create your starting time stitch across the seam.

Now you can repeat this back and forth motility throughout the entire seam.
But equally you get through the seam, do non pull on the needle and thread too tight. This will get in much harder to end the seam and run the risk of losing the ballast thread.
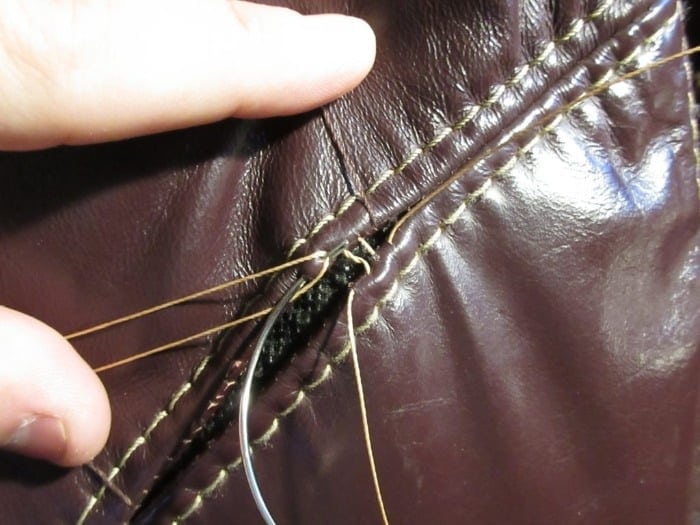
Continue this back and along of going through one hole and out the hole next to information technology. Then go into the parallel pigsty you but came out and back out.
If y'all find it hard to push or pull the needle through the holes yous can use needle nose pliers to help out.
Once you have reached the terminate of all the open holes you should have a seam that looks something like the one below.
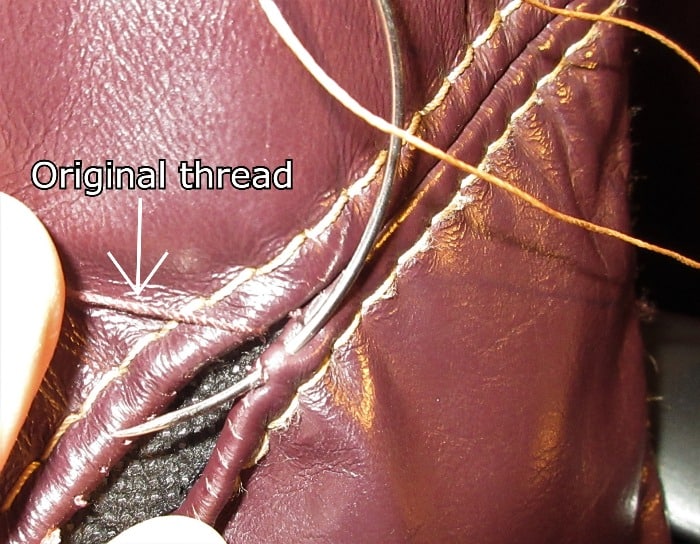
Both of the original threads should be on the contrary side of the new thread. In my case, both original threads are coming out of a top hole while the new thread is coming out of a lesser hole.
If they exercise non line up with each other you will but want to pop out the original thread from some other hole.
Now that the new seam has some thread in it nosotros tin can finish up the broken seam.
Step 3. Finnish repairing the broken seam
To shut and secure the new seam we want to start by taking both sides of the new thread and pulling away from each other.
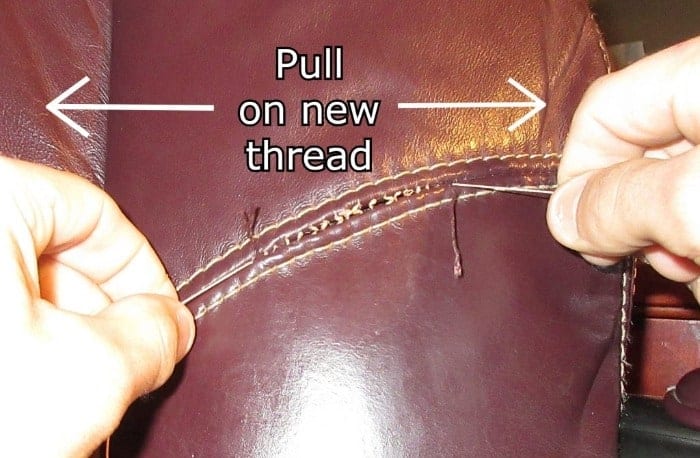
After giving the thread a pull on each side, you lot should detect the seam close upwards looking almost finished.

At present you can take the new thread and the old thread on each side and tie two knots in them.
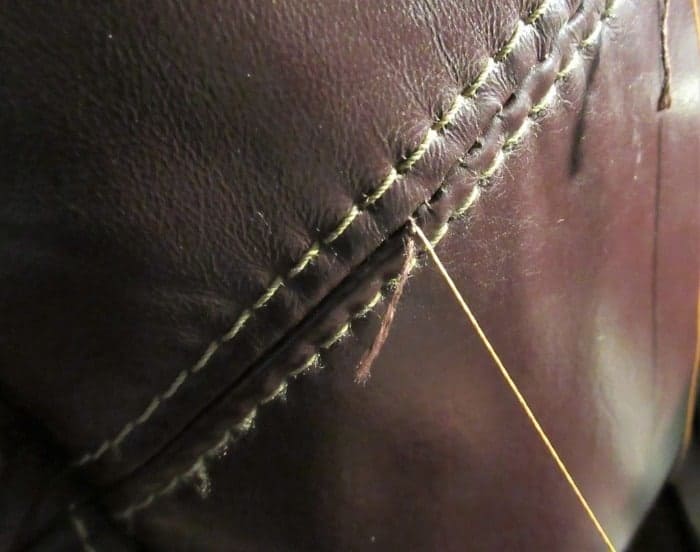
Once the knot is secured in place nosotros volition want to hibernate the knot and backlog thread. To exercise this you tin place the new thread through the center of the hook needle and go into the seam and back out in betwixt the seam.

Pull the needle all the style through the seam making sure the knot has sunk into the seam.
Lastly, cutting off any extra thread that is hanging out of the seam.
If there are any pieces of the thread still sticking out of the seam, but use the barrel of the needle to push the thread back into the seam.
And there yous take any easy guide on how to repair a broken seam in leather upholstery by hand. Very piece of cake and simply takes a couple of materials to accomplish.
Plus if you are into leather crafting you probably will have some of these items lying around your house.

Source: https://mazeleather.com/how-to-repair-a-broken-seam-in-leather-upholstery/
Posted by: stegmanthoning.blogspot.com
0 Response to "How To Repair The Seam On A Rubber Room"
Post a Comment